Introduction
Getting angry and reacting to small things is harmful to our mental health. We are going to see in this session which Yogasana can calm frequent anger.
Due to changing lifestyles, stress and anxiety are increasing among people. Getting angry and reacting over the smallest things is damaging to our mental health. In order to get out of this situation, many types of treatment are started taking medicine which gives a temporary reason. But this problem cannot be fixed. In such a situation these problems can be overcome with the help of yoga.
There are many people who are constantly angry. To avoid this condition, it is necessary to practice certain Yogasanas. Anger problems can be controlled by regular practice of Yogasanas. We are going to see in this session which Yogasana can calm frequent anger. So let’s take a look at those 5 Yogasanas.
1. sarvangasana
To get more benefits of this asana you should follow the steps given below.
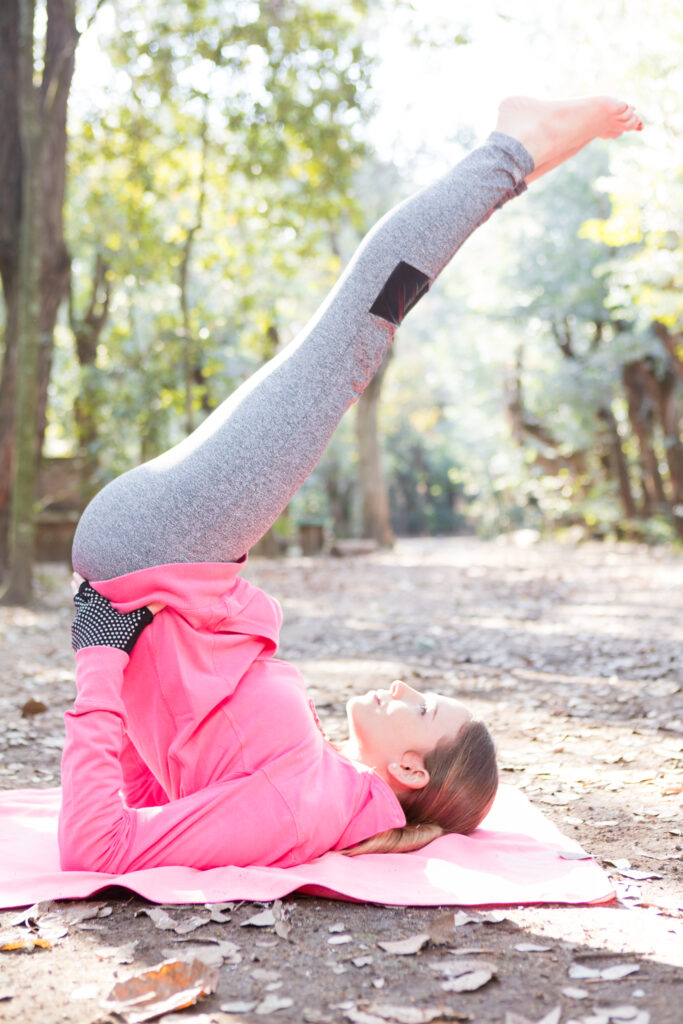
How to do
1. A folded blanket should sleep with the head, back and legs together.
2. Relax your body and neck with palms facing the floor at the sides of your body.
3. Slowly raise your legs in a standing position with the support of your hands, contracting the abdominal muscles.
3. After your legs are in a straight position tomorrow, press the arms down.
4. Gently rotate the trunk to a vertical position by rolling the hips and spine off the floor.
5. Place your hands on the lap and press your chest to the chin, allowing your elbows to bend, under the ribcage.
6. In reaching the final position, the legs should be standing with the trunk and shoulders placed against the neck and the back of the head with the chest facing the chin.
7. Hands should stabilize the body.
8. Close your eyes and relax your body and hold it as long as it is comfortable.
9. Returning to the original state is a slow process.
10. Slowly bring forward with legs straight and feet up and back.
11. Keep your hands by the sides of your body, palms facing down.
12. Slowly and gently bring each vertebra to the floor following the hips.
13. Resume the legs in the initial straight and vertical position.
14. Keep the knees straight and gently bring the feet to the floor and do not support the arms.
15. Maintain body contact while doing this Yogasana.
16. Rest until your breathing and heart rate return to normal. Shavasana is the preferred asana after the shoulder stand as it is a restorative 16 yoga pose that helps to relax the body at the end of the session.
17. Breathing should be continued throughout Sarvangasana. Do not strain the body by staying in the final position for too long during the initial practice. This period should be gradually increased to three to four minutes. Sarvangasana should be done only once during Yogasana.
2. Anulom-Vilom
To get more benefits of Anulom-Vilom or Asana, you should follow the given steps.
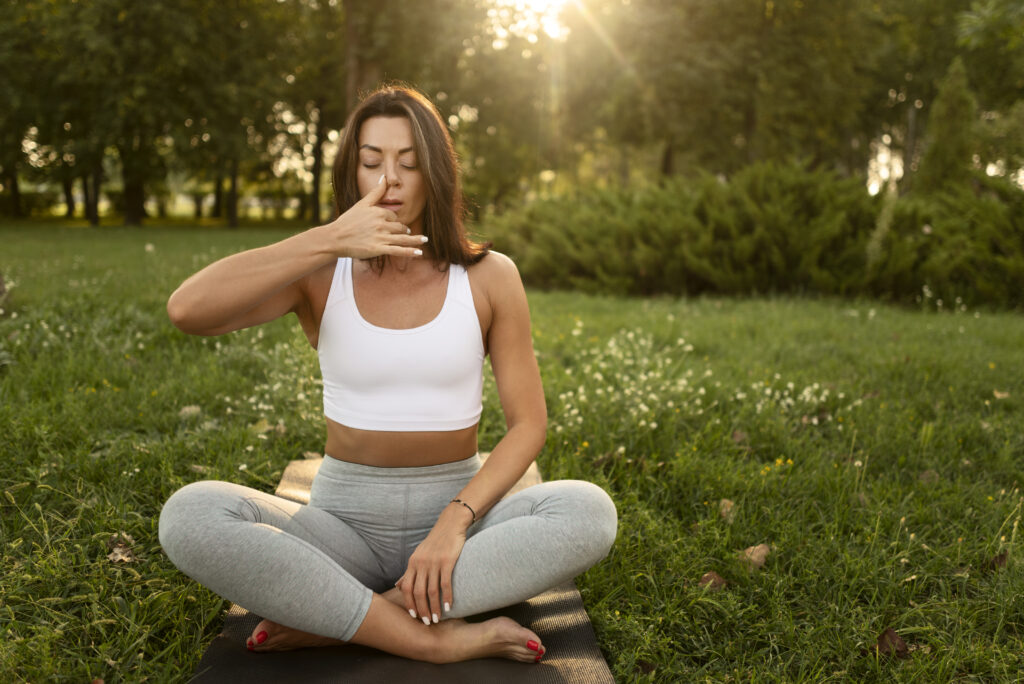
How to do
1. To settle in a comfortable state, start a quiet and comfortable Jag Shodhavi and or Yogasana. Make your reader sit with his back straight and shoulders relaxed, on the ground or by finding a cross made of scratch.
2. It is beneficial to start practicing Anulom-Vilomam or Pranayama after cleaning the nose. Nasal council cleaner net pat or nagpur vapava.
3. You should adopt Pranayama Mudra by keeping your right thumb towards your right nostril and your ring finger towards your left nagpur. Your index and middle fingers should be placed under your hair.
4. Close your nostril with your right thumb, open your left nostril and inhale slowly.
5. After taking a full breath, close your left nostril with your thumb and exhale completely leaving the right nostril.
6. Open your right nostril and inhale, close it again with your right hand and exhale completely leaving your left nostril.
7. Here one cycle of Anulom-Vilom Pranayama is completed. Yes, by maintaining rhythmic breathing, each breath should be exhaled correctly through the nostrils. Inhale through one nostril and switch and inhale through the other nostril.
8. While practicing, focus your attention on the breath, concentrate on each inhalation and exhale, feel the flow of air and let your mind sink into the present moment.
9. If you start doing Anulom Vilom Ha Pranayam in a new way and slowly increase the duration, it will be more comfortable to practice.
10. After completing the desired period, observe the flow of your natural breath by releasing both the nostrils and remain calm for a moment.
3. Sukhasana
To get more benefits of Sukhasana, you should follow the steps given below.
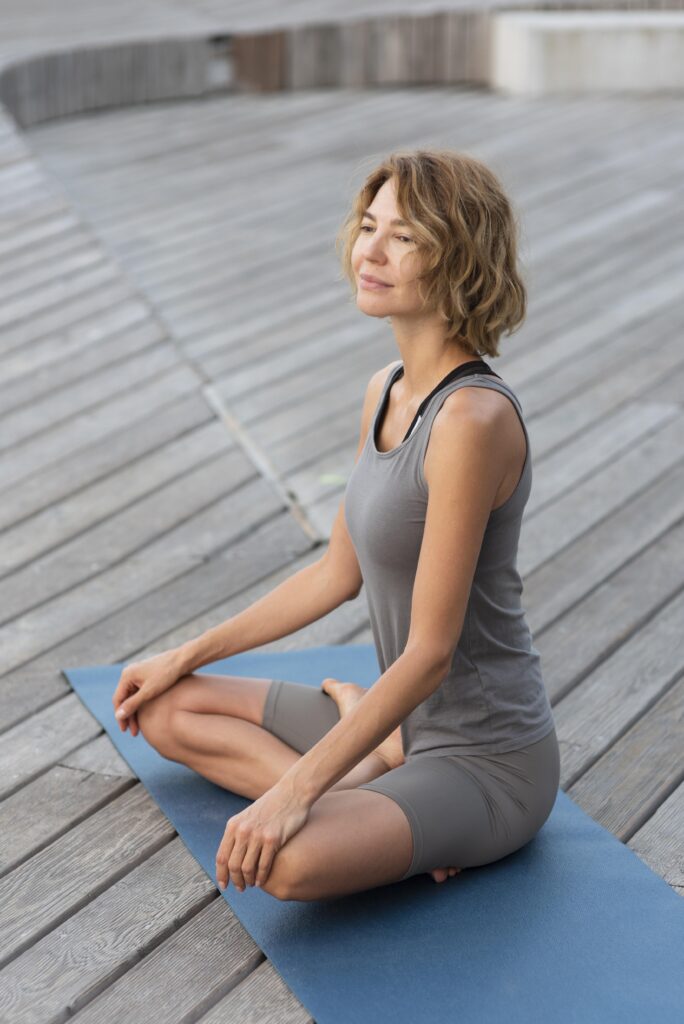
How to do
1. Start straight and your feet should be in front of your body.
2. Your claim should be kept in your right place. Follow the same path with your right foot and leave your left foot empty. But the process should be done in a hurry. It may take some time to achieve the desired state by practicing new yoga asanas.
3. Or slowly adjust the feet and body comfortably in the yoga position.
4. Keep moving forward with respect and determination.
5. Keep your soles on your mandivar and remove the leprosy. Relax your shoulders and close your eyes.
6. Keeping the focused shell breathing will relax the body and mind.
7. In a happy state, you can meditate as long as you want. The position of Asel Kartana changed every time.
4. Cat Pose
To get more benefits from Marjorie Seat or Asana, follow the steps given below.
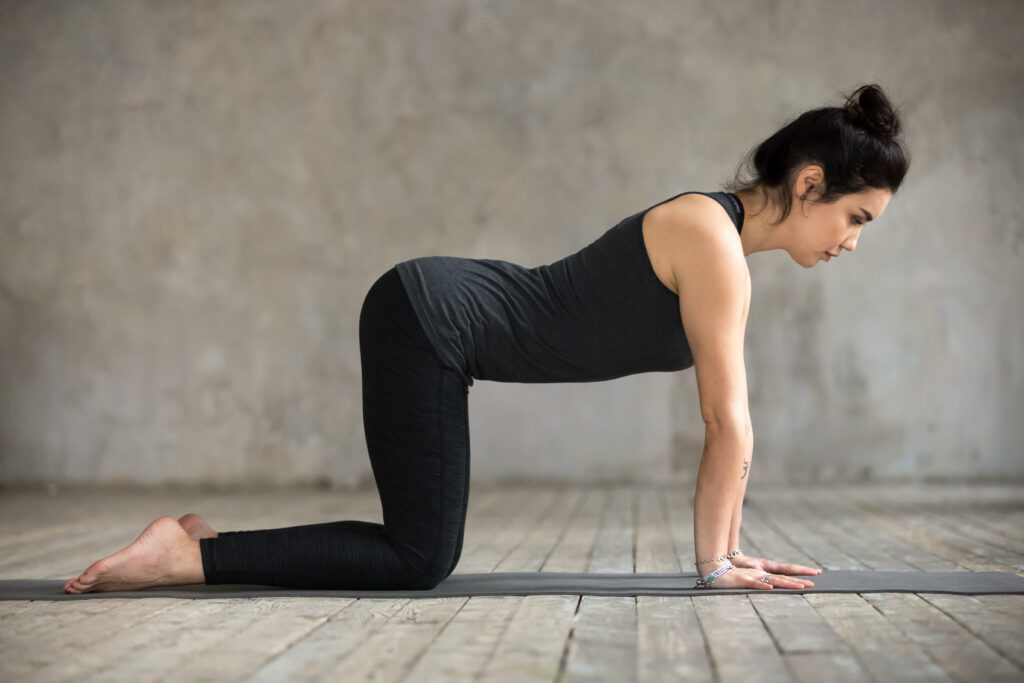
How to do
1. Start with your hands and knees. Your forehead should be free from your shoulders and your buttocks should be free from your buttocks.
2. Inhale and move towards the ceiling, command your breath and make your stomach empty towards the ground.
3. While exhaling, press your elbows into your chest, round your navel and make your mankyakade anavi.
4. Or repeat the movement, inhale while looking at the groom and exhale while turning your beads.
5. Halwa does many inhalations slowly and carefully.
6. When you are ready to jump, lie down in a neutral table top position.
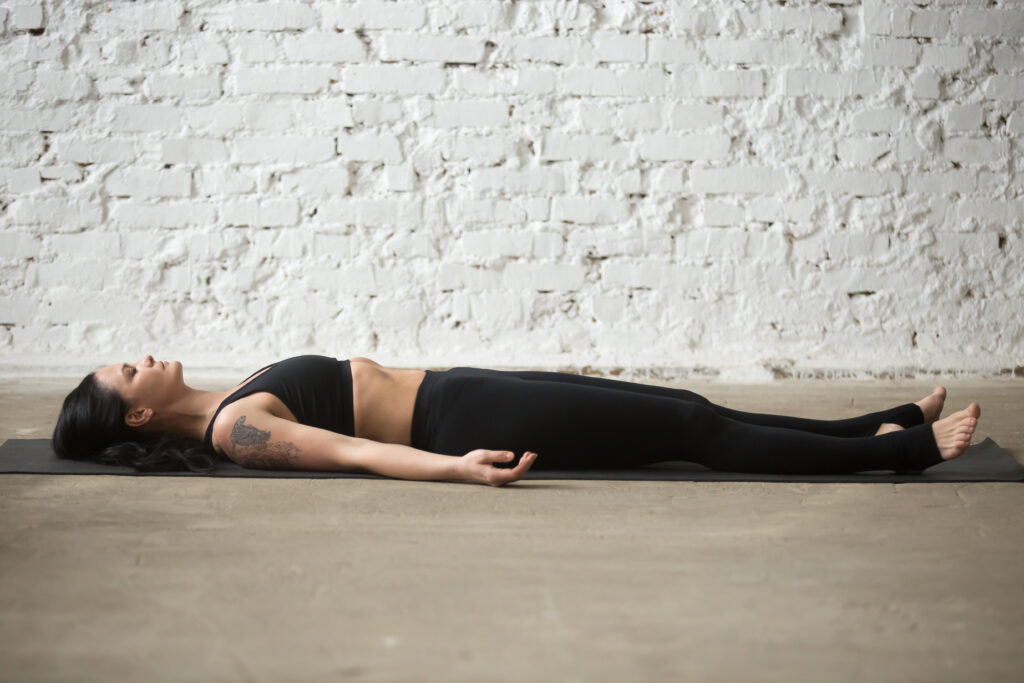
5. shavasana
To get more benefits of dead body posture (shavasana), follow the steps given below.
How to do
1. Keep your feet together but do not let them touch each other. Keeping your hands close to the body, groom your soles.
2. Keeping your eyes slowly closed, relax the facial muscles, open your nose and take slow breaths.
3. Focus on every part of your body all the way from the top of your head to your bare feet and relax them consciously before moving on to the next step.
4. Remain in breathing for five minutes or more. If you fall asleep in Shavasana then Asel should start breathing a little faster and more freely.
5. Duration/Repetitions We recommend that you start breathing for at least five minutes of yoga practice duration. , To relax and refresh the body and mind, during your asana session, come back from time to time and take rest for at least five to ten minutes. Your session is over.
Precaution
Yogasana should be practiced in a calm environment by relaxing the body and mind. Do it on an empty stomach or with snacks while practicing yoga. If you feel weak while exercising, mix some honey in warm water. Yogasanas should be started only after passing stool and urine.
Conclusion
Due to changing lifestyle, stress and anxiety are increasing among people. You get attached to small things and respond to them, which improves your mental health and reaches out from the situation. We have told you 5 yogas in the above session, you should practice them regularly and it will help in getting relief from people who are feeling stressed and worried due to change in lifestyle.



Pingback: 5 Super Brain Yoga Exercises To Brain Detox
Pingback: 3 Simple Yoga Poses To Instantly Boost Your Confidence